
 1 | Project Setup & Templates
 2 | Data Structure
Part 1 | Add to Cart
Overview:
In this module we will begin to add in core user functionality such as “add to cart”, “update cart” and “checkout”.
For now we will only cover functionality for "Logged In" users and take care of "Guest Users" functionality in the next module.
Users will be able to checkout WITHOUT payment for now. This is so we can cover the core logic and integrate that in the module after we add in guest checkout capabilities on top of what we will add in this module.
Using Javascript
We will be using Javascript to handle a lot of the frontend functionality and sending data to the backend. If you're not too comfortable with Javascript I'll try to keep things as simple as possible but I definitely recommend you continue with this section after you have some base knowledge or at least give yourself time to study it along with this tutorial when something does not make sense.
Step 1 | Cart.js
 00:42:00
Our home page "store.html" and cart (cart.html) will both give the user the ability to add to and remove items from our cart.
Because of this, we want to write this logic in one file and simply link it to our main template so it can be available on all pages that need it instead of having to repeat our code.
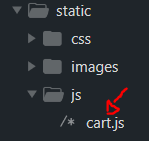
Create JS folder + file
In our static folder let's create a folder inside called "js". Inside the "js" folder create a file called "cart.js".
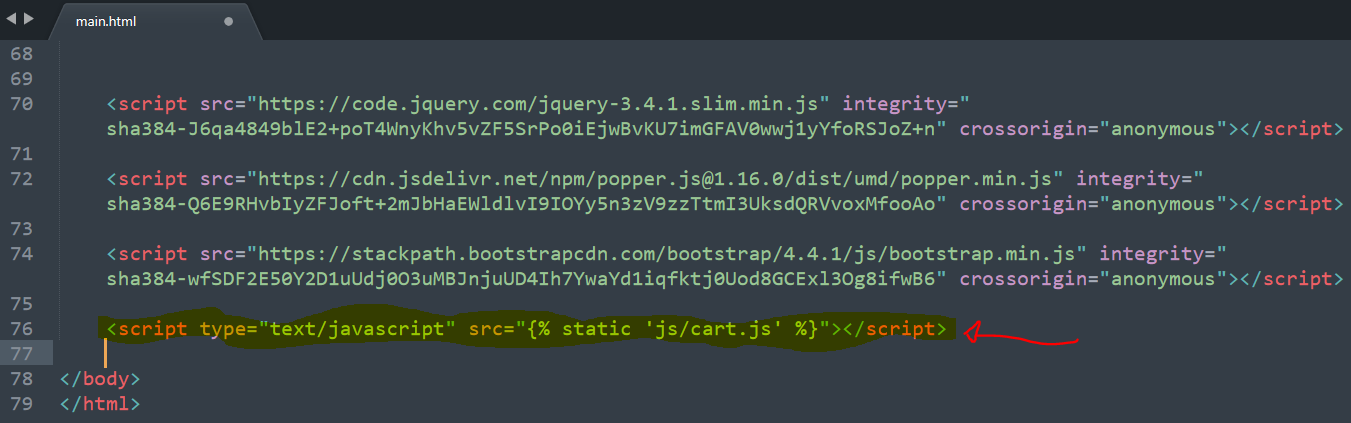
Ad JS script link to template
Now inside “main.html” add a script tag with a file path to our new js file at the bottom of our page, just underneath where we have our Bootstrap links.
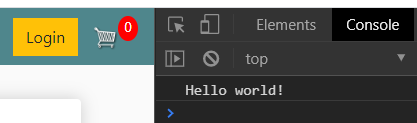
Confirm Link Connection
Just to make sure it's linked up correctly: try to console.log('Hello world') and open up the page to check the console.

Step 2 | Add Event Handlers
00:02:58
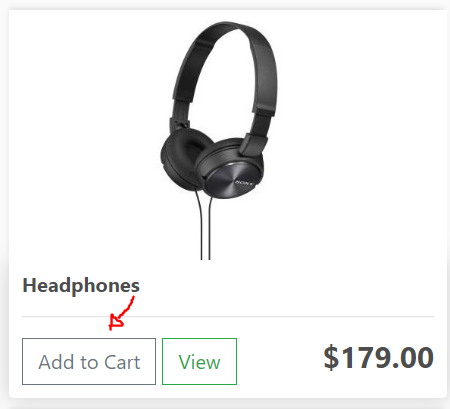
Let's add an event handler to the buttons on store.html.
Add Class to Buttons
First let's add the class of “update-cart” to the add button.

Product ID & Action
We also want to add in a custom attribute to the button so we know which product was clicked. To set a custom attribute all we need to add in data-”attribute_name=value”.
In our case we will call ours “product” so go ahead and add data-product=”{{product.id}}”. On each iteration the we will pass in the product id as the “product” attribute.
Let's also add an action attribute that lets us know that when this button is clicked we want to “add” an item. This will make more sense later when we add in the ability to remove an item or decrease quanity in the cart.

Add Event
Now to finish this off, let's query all the buttons by the class of update cart in cart.js and add an event handler in a loop.

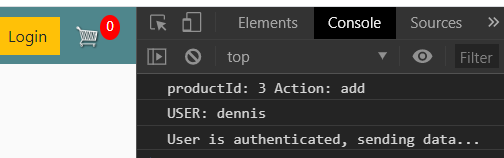
To test things out, let's console out the product id and action and click some of the add buttons.

Step 3 | Use Type Logic
00:09:25
Depending on whether the user is logged in or not, we want the add to cart button to behave differently on each click. For example; when a user is logged in, we want to send data to the backend and add this item to the database. But if a user DOE'S NOT have an account, we want to simply add some data to the browser and store it.
For now we'll just stick to logged in users and ignore clicks made by Non-logged in site visitors.
Set/Query user (main.html)
First, we want to query the users to check his/her status. In main.html within the header tag, let's create a script tag and set the variable of "user" to "request.user". If a user is not logged in, the value will be “AnonymousUser”.

Because the cart.js file is at the bottom of main.html, we can access this user variable within cart.js
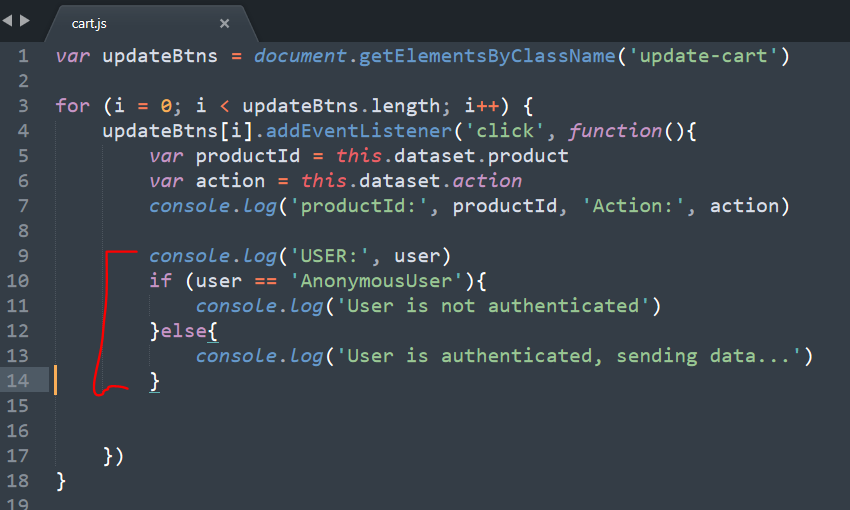
Check user status on click (cart.js)
Let's create an if statement inside cart.js and console the user and two different statements depending on whether the user is logged in or not. Make sure this is inside our event handler that we added earlier and test it by logging in and out and checking the console.
Test in console
View Source Code
Step 4 | updateItem View
00:13:06
When a logged in user clicks "add to cart", we want to send this data to a view to proccess this action.
On click we will send the Product id along with an action of "add" OR "remove" to the view we are about to create. The view will then be responsible for creating or adding quanitity to an OrderItem OR removing or deleting the item if the action sent over is "remove".
Create View
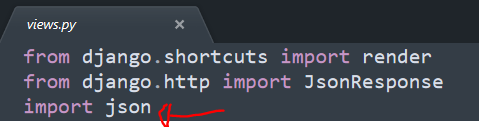
First, let's create a function in our views.py called updateItem and set the return value to a simple JsonResponse. You’ll want to import Json response at the top of your "views.py" file to make this available.


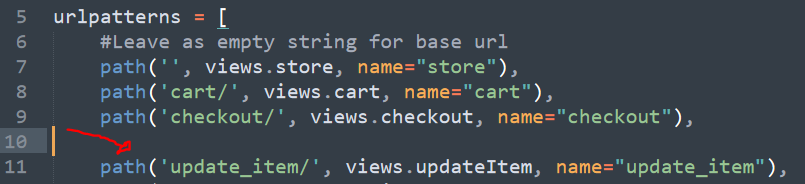
URL Path
Now in our "urls.py" file, let's create a path for our new view.
Step 5 | updateUserOrder()
00:14:59
We now have an event handler that identifies which type of user has clicked the "add" button (Logged in/guest) and a view.url to send data if that user is logged in.
Let's now create a function that gets triggered if our user is logged in and have that function send a POST request to our new view (updateItem).
Create Function (updateUserOrder())
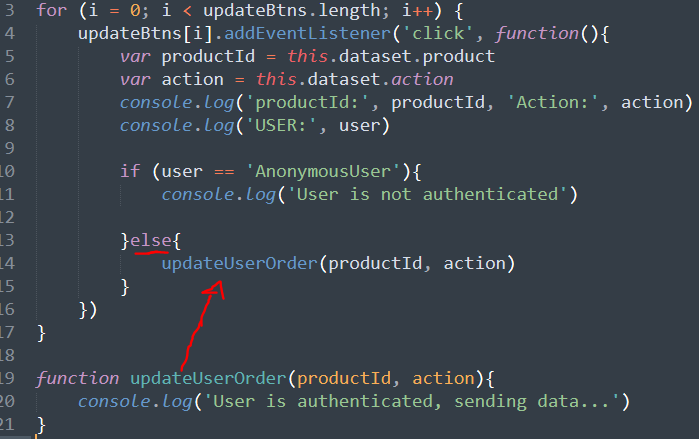
Just underneath our loop in cart.js, let's create a function called updateUserOrder() and give it two parameters, “productId” and “action”. Then pass the function into our "if" statement so it gets called when the user is logged in.
We can just pass the original console statement into the new function.
Send POST request to View
Next we will want to set the url variable to update_item and create and use the fetch api to send a post request.
In the post request we want to stringify and send our productId and action as a Json object.
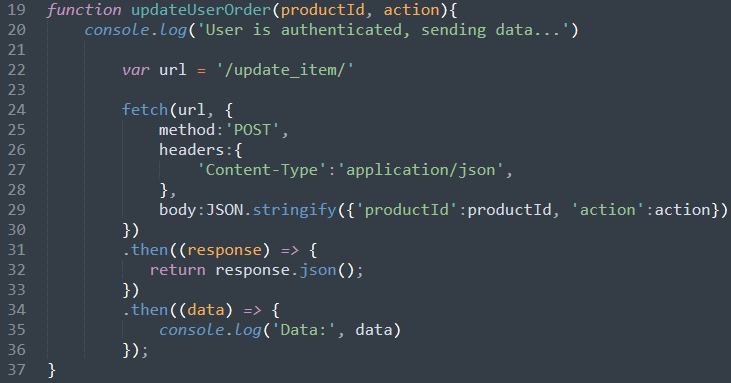
Now, before we send this data we need to take care of creating and sending a csrftoken along with it as Django wont let us send a post request without one. We'll cover this in the next step

Step 6 | CSRF Token
00:20:57
Right now our updateUserOrder function in cart.js will return an error because we are not sending a csrf token.
Traditionally we send a csrf token in a form by passing it in like this within the form {% csrf_token %}..
Because we are using Javascript to send data and are not actually submitting a form so we will need to create our own token and pass it in with the post data. The Django documentation gives us a work around so I’ll link up the instructions on creating our own with slight customizations.
Create Token
We’ll create our token within the script tag we made earlier inside our main.html file. I copied and pasted exactly what the Django documentation tells us but I changed the name of the function from getCookie() to getToken().

Send Token with POST request
Now that we have the “csrftoken” variable set, we can pass it into our fetch() call.
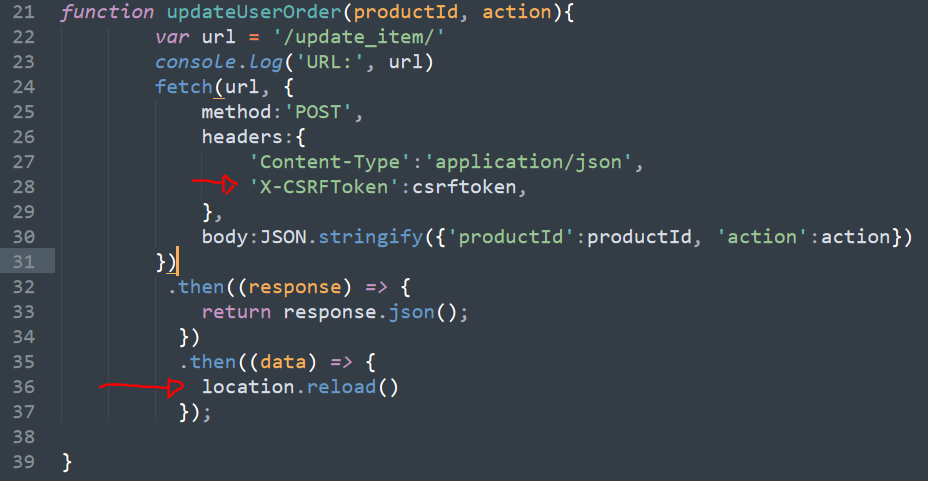
It’s not the best way to go about this, but let's just have the page also reload once our call returns as successful with location.reload(). This will alow us to see changes appear in our cart immediately once we render them.
Now when we send post data, everything should work the way it's supposed to.
View Source CodeStep 7 | updateItem view logic
00:23:52
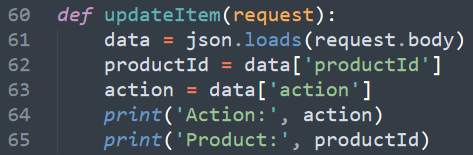
Now we want to process the “productId” and “action” when we send this data to our view from the fetch call.
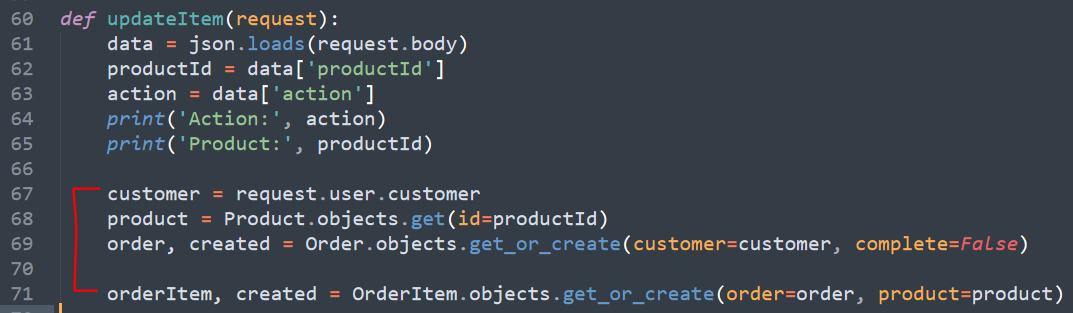
Parse Data
First, let's import Json at the top of our "views.py" file and use this inside our updateItem view to parse the data. We’ll want to set the action and productId variables by accessing the data variable.
After we parse our data and set the value of data we can access values as a Python dictionary. To ensure everything is working, go ahead and click the "Add Item" button in your store and make sure "action" and "ProductId" are being printed properly.

Create OR Update Order & OrderItem
We are going to use the product id to query the product and use "get_or_create" in order to work with the status: "False", because the complete attribute means it's an open cart we can add to.
We want to do the same thing with the order item and set the order and product to the values we have above. The reason why we use get_or_create is because later in the cart page we want to have the ability to update the quantity of an order with the "add" action instead of creating a new one every time.
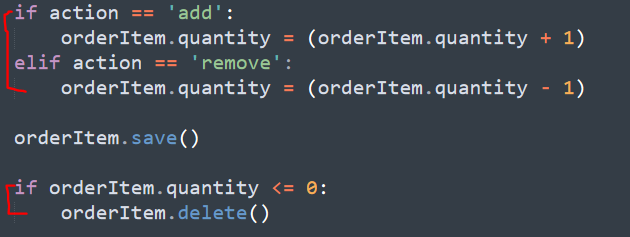
Action Logic
Finally, we want to add in some logic to update or remove an item from our order.
We haven't used “remove” yet, but essentially we want to update the quantity based on the action. The second part checks if the quantity is at or below zero, if so we want to simply remove this item from the cart.
Step 8 | Cart Total
00:30:40
Let's add the cart total to the cart icon as we add and remove items.

This is where we would really benefit from using more Javascript and having some sort of API built out. But, because I'm trying to limit that in this tutoruial, we are going to need to query the user in each view and render out the total so that we can access this value on every page since it's our navigation bar.
Again, there are many ways to go about this but I'm doing things manually for effect.
User data in store view
It's going to get a bit messy now. But, don't worry, because we will clean this up in the next module.
Let's start by first copying our user query in the "if" statement and adding it to our store view.
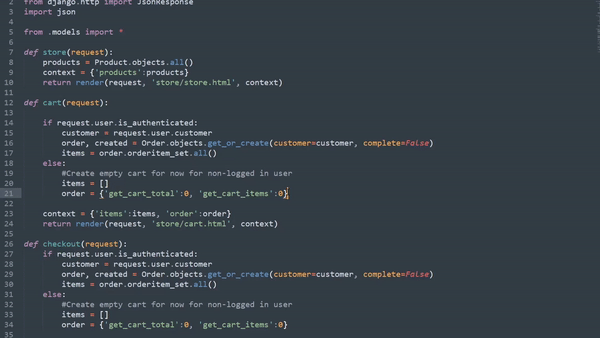
Cart Total
In the store view: let's use the order objects "get_cart_items" method we set in our "models.py" file to query the cart item count.
For users without an account, let's query the order dictionary and also get the total by finding the key. Once we have the total set for both conditions, let's pass it into the context dictionary.

Get total in all pages
Remember that we want the header to display the same total on all the pages. Let's repeat what we did above and query/add the total into the context dictionary.

Add total to template
Now that we have passed in the total to all pages; let's add it to our navbar.

And this should now be your output.