
 1 | Project Setup & Templates
Part 2 | Templates
Overview:
Now that we have our app (store) configured with our project, let's create a folder to store our templates. Our html files will be stored within our app inside a folder called "templates".
Step 1 | Create Templates Folder
 00:05:55
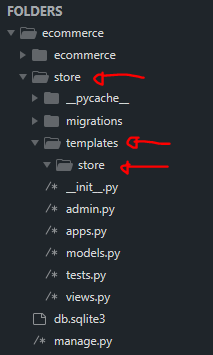
Inside the new app (store) create a folder called "Templates", inside the templates folder create another folder with the same name as the app. In this case if you called your app "store", like I did, then that should be the name of the folder.
It looks redundant, but the file structure should look like this appname (store) --> tempaltes --> appname (store).
Step 2 | Create Templates
00:06:26
Inside the folder we called "store" (Inside the templates folder) is where we will store our html files.
Right now, let's create all the templates we will need along with one main template that all the other templates will inherit from.
- Main.html → Template which all will inherit from
- Store.html → Home page/store front with all products
- Cart.html → Users shopping cart
- Checkout.html → Checkout page
For now add on the name of each page in h3 tags so we can test them
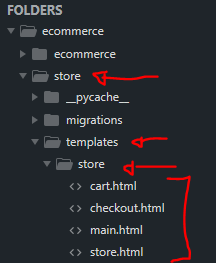
See image above to ensure you're creating the html files in the right folder.

Summary:
In the next part we will take care of rendering these by creating "views" and "url paths".
← Previous: Part 1 | Configure App Next: Part 3 | Views & URLs →