 1 | Project Setup & Templates
Part 9 | Checkout.html
Overview:
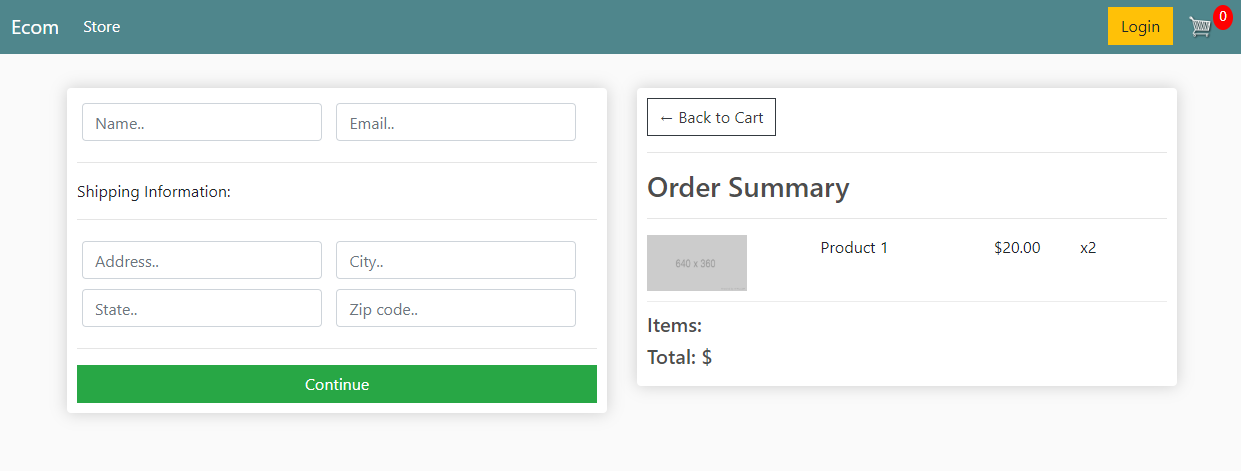
Ok, so for the last page we will be styling before moving on to creating our database will be the checkout page. At the end of this part, if everything was done correctly our checkout page should look like this.
Step 1 | Layout
 00:48:35
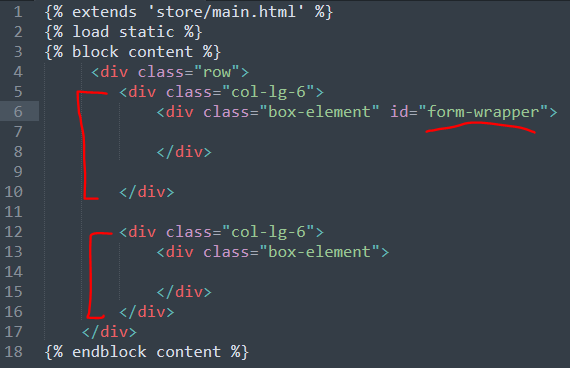
As you can see in the image above this will be a two column layout with our custom box-element inside. So for this we will need one row, two columns with the class of "col-lg-6" and for the moment, a div with the class of "box-element" inside each column. Let's also give the "box-element" on the left side an id of "form-wrapper" since this is where our form will sit.
Step 2 | Form
00:50:30
This page will have one form with two separate sections that will change depending on the users status and product type.
If the product is a physical product that requires shipping, we will prompt the user with part two of this form and will hide if user is only ordering digital products.
For now we will display both parts of the form and will add in logic to hide sections later.
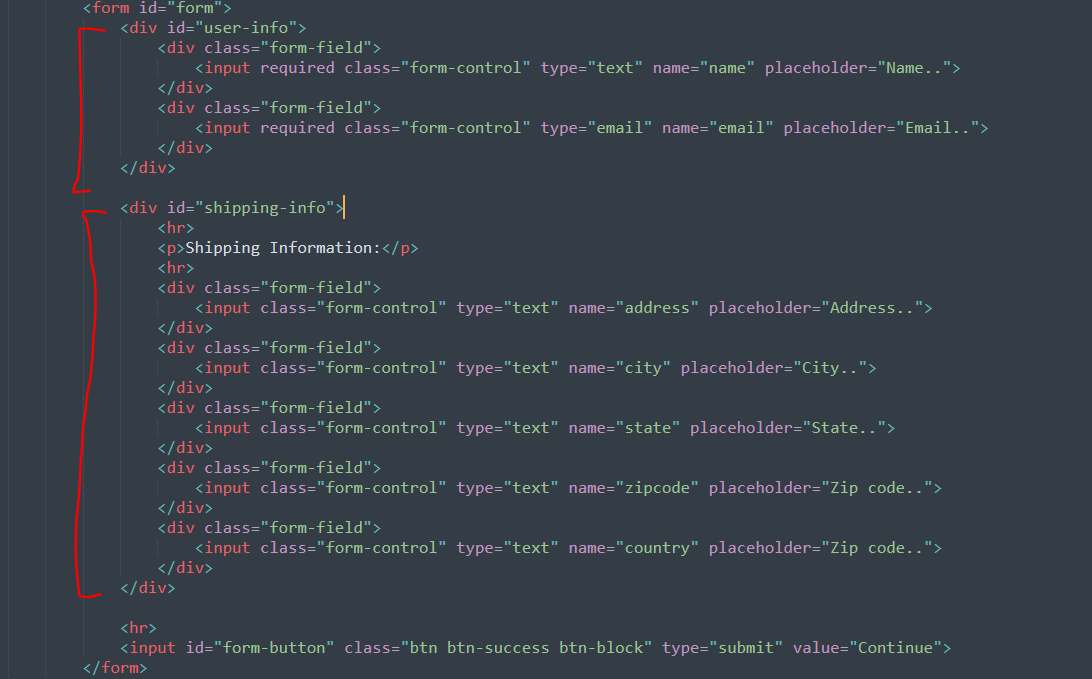
Inside the div with the id of "form-wrapper", let's create a form with the id of "form" and add in two divs inside. Give the first div the id of "user-info" and the second div the id of "shipping info".
Give the submit button the id of "form-button" and add some Bootstrap styling.
You page should look like this:
![]()
There are many different ways we can style form fields but I like to create my own wrapper around each field to have more control.
Inside the form in the div with the id "user-info", let's add two form fields with the name of "name" and "email" wrapped inside a form-field div.
And inside the "shipping-info" div we want the following fields:
address, city, state, zipcode, country
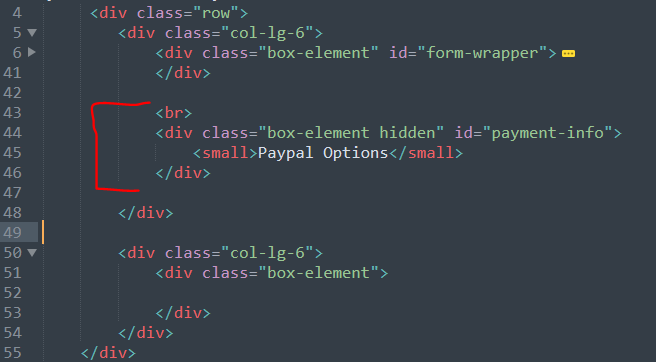
Step 3 | Payment Option
00:54:09
Just underneath the box element in the left column (Under our form), let's add another box element with the class of "hidden" and the id of "payment-info". This information will be hidden until the user fills out their contact info OR is logged in. We will address this logic later but for now this item can remain hidden.
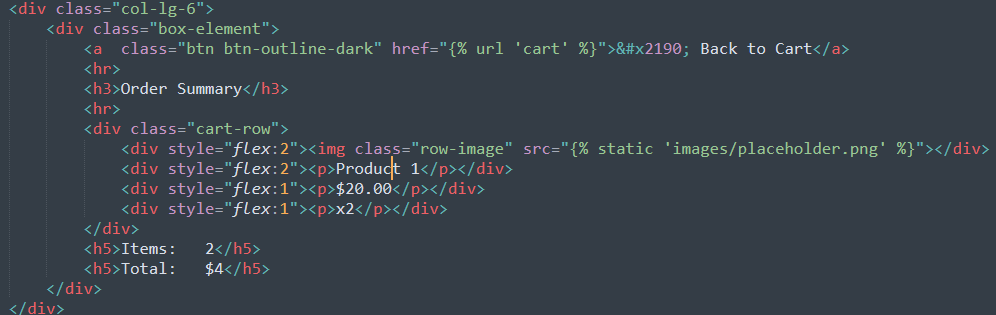
Step 4 | Order Summary
00:56:02
On each page we want an order summary and a link back to the cart page in case the user wants to make some changes.
Inside the right column in the box-element div, let's first add a link back to the users cart.

And just underneath the link let's add a title of order summary with some <hr> tags for separation.

Finally we will create the same style cart rows just like we did for checkout.html, only now we will have less columns.