 1 | Project Setup & Templates
Part 4 | Static Files
Overview:
Before we start working on our templates, let's configure the static files for or images, css and js files.
Step 1 | "Static" Folder
 00:12:40
In your root directory create a folder called "static".
Inside the new “static” folder, let's create a folder called "CSS" and another called "Images". These files will hold all of our CSS and Images.

Step 2 | CSS File
00:13:50
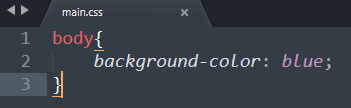
Inside the CSS folder, let's create a file call main.css. This file will later be the main source of styling for each page along with the bootstrap CDN.
Inside "main.css", let's just style the body and make the background color blue so we can see the effects right away.
Step 3 | STATICFILES_DIRES
00:14:08
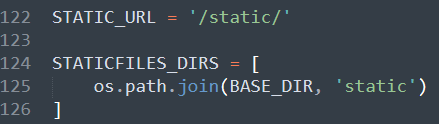
Now in order to see this effect, let's configure things in settings.py and then add this link to our template.
In "settings.py", we should already have "STATIC_URL". Now we will just need to add "STATICFILES_DIRS" and point it to the new static folder we created in our base directory.
Step 4 | Add Static Files to Page
00:14:53
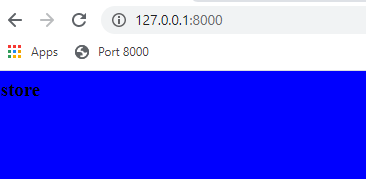
Once we have things configured in settings.py, let's add the stylesheet to our template. For now let's just add it to our home page “store.html”.
First we will need to load static into the template and then add the link with the dynamic path.

This give us an ugly blue background. It looks terrible now but at least we know it works :)
Step 5 | Add Image
00:16:11
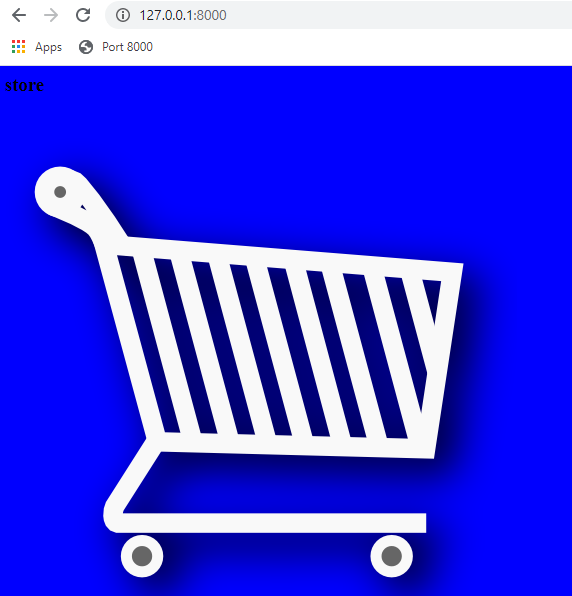
Ok the last thing we need to do for the static files configuration is add in an image and link it to our page.
I will link up the shopping cart icon below. Download the image and add it to your images folder.
Click Image to download

For now all we need to do to add this image to our template is create a similar file path like we did without css but this time to the image tag. We will have to do more with our static files later but for now this will do.
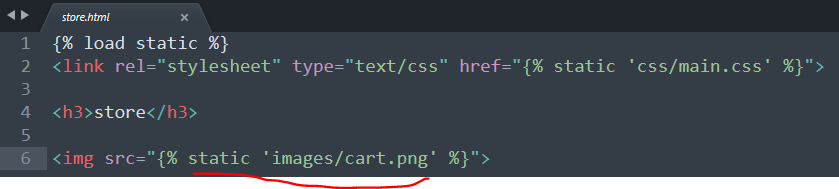
Your template should now look like this.