
 1 | Project Setup & Templates
Part 3 | Making Payments
Overview:
At this point we have most everything we need for the payment integration. Now we just need to test our payments, set the price to represent our order total and process the order on the backend when the payment is successful.
Step 1 | Test Payments
 00:15:49
Lets first test the Paypal checkout button within our checkout page. Click the button and login with the “personal” sandbox account we just set up.
Right now you total should only be $0.01 because we have not configured the price yet. Go ahead and complete the order, then login to both sandbox accounts and make the transactions go through on both ends.
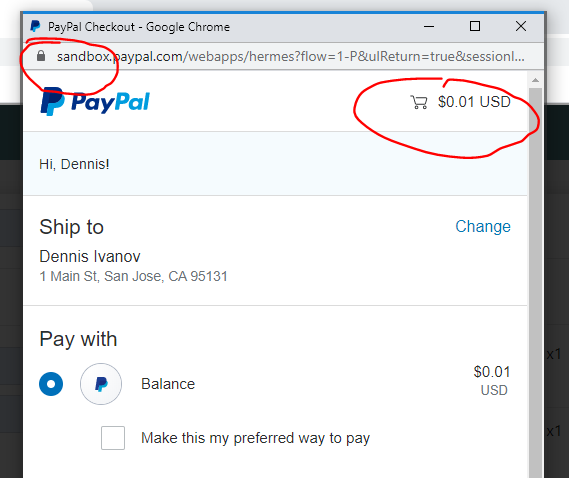
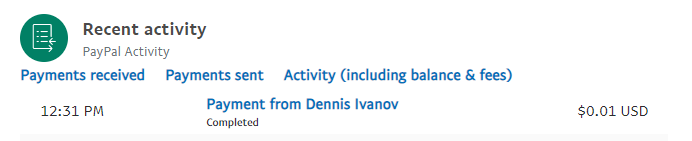
Once you complete this transaction you should be able to login you your sandbox accounts and see it within your account activity, this may take a few minutes to appear so give it some time.
Step 2 | Setting Price
00:17:40
Now that our buttons are working and we have seen a transaction go through, we can set the price to represent our actual cart total and not just $0.01.
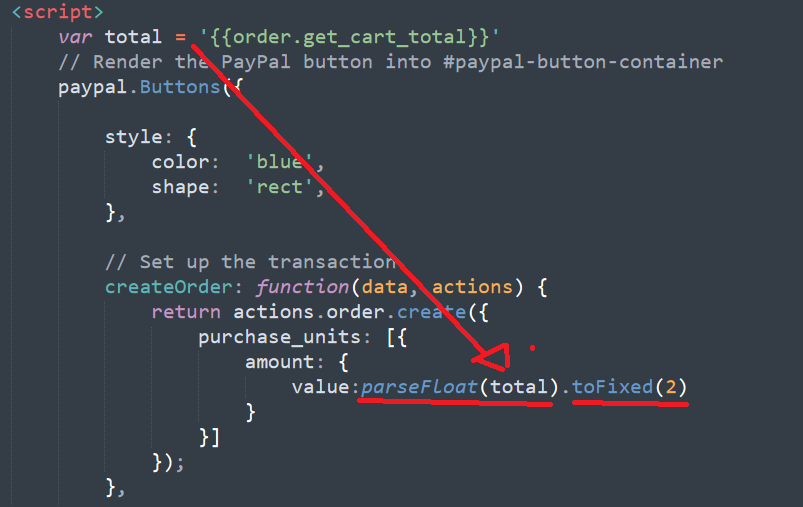
Move "total"
Let's first start by moving our “total” variable to the top of the script tag we added for our paypal buttons. We need to access this total without our buttons so we need this value available right away.

Add total to buttons
Now we can replace $0.01 with our cart total. Because this value is a string we will need to convert it to a float and then ensure that we only have two decimal places to the right.
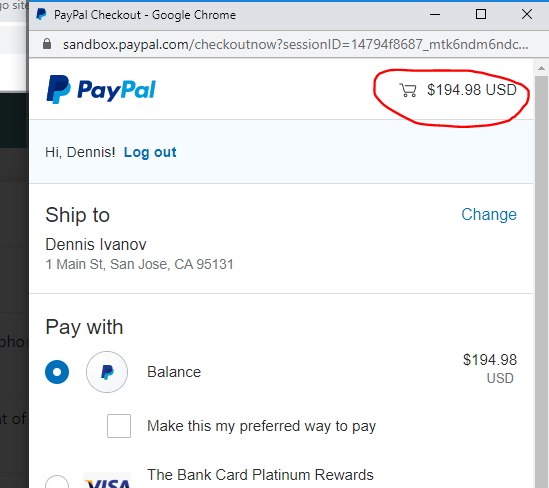
No if we click the paypal checkout button we should see the real cart total.
Step 3 | Process Order
00:20:03
At this point most of the work is down for processing the order. All we need to do now is take the function (submitFormData) we used to trigger on make-payment click and add it inside the on approve method.
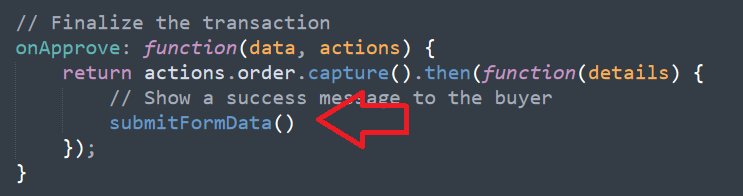
Our process should look like this when we are done:
Trigger Paypal Checkout → User Makes Payment → On Payment success “submitFormData()”
All we are doing is just holding off our order processing until the user makes the payment.
View Source CodeStep 4 | Live Client ID
00:22:49
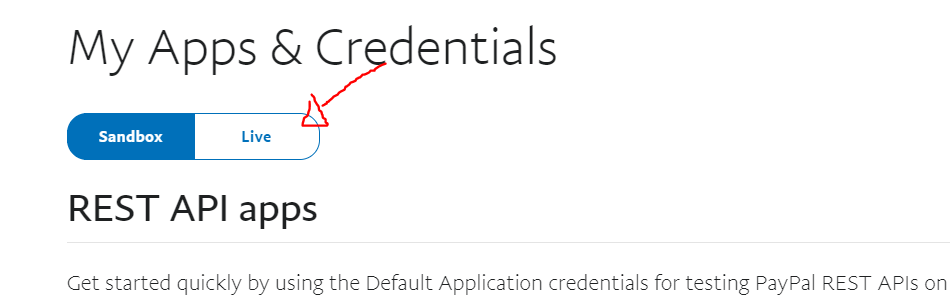
Once you ensure everything is working, you can update the test API key with a real client ID to ensure transactions go to your paypal account.
To do this just go back to this link https://developer.paypal.com/developer/applications/ and click the live button. Create an “app” and use the live tab this time. Create an app for the project you want to use this on and switch out the old client id in the script tag with the new one.
Thats it for now! Your app should now be able to take in real payments from real customers :)