
 1 | Project Setup & Templates
Part 4 | User Cart
Overview:
To close out this module let's manually add in some user data in the admin panel and render it in the cart and checkout page.
We’ll attach a customer to our user, and add some order items to go with the order which we will manually create from the admin panel.
By the end of this part our cart and checkout page will render orders/items the logged in user has in his or her cart.


Step 1 | Add data (Admin Panel)
 00:33:39
Let's start by logging into our admin panel and creating some data.
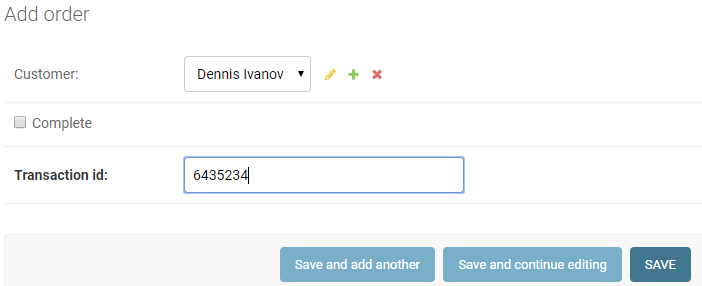
1. Create Customer
First let's create a customer instance and connect to the current logged in user.

2. Create Order
Create an order and attach to your new customer. For now just manually set the transaction id to some random characters.
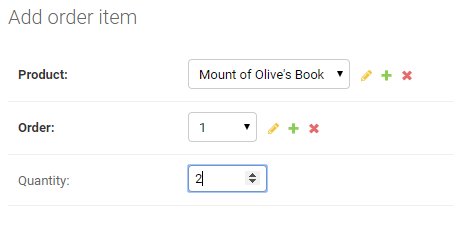
3. Order Items
Finally go ahead and add a few order items and attach to the order we just created
Step 2 | Query Data (Cart)
00:35:08
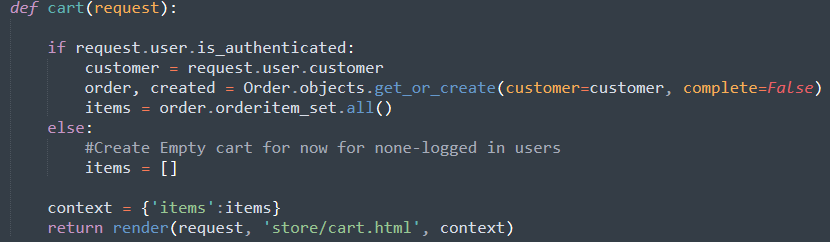
In order to load pages correctly we will need to create two different scenarios in our views. One for an authenticated user and one for a simple page visitor.
We want both logged in and not logged in users to be able to view the pages but also not break the page when we can't find a registered user associated with the page visitor.
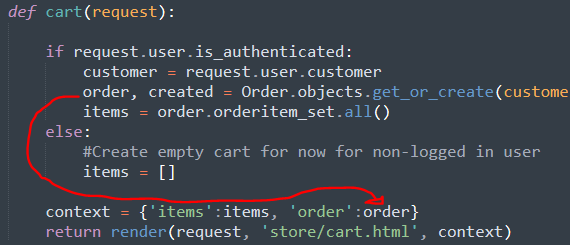
Query User Cart
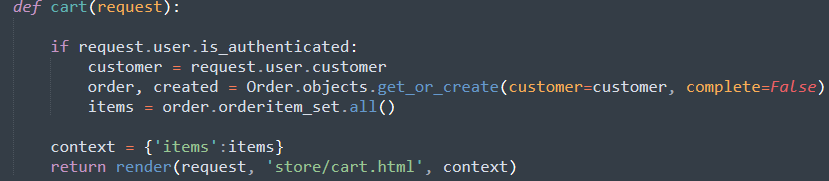
In our cart view we want to start by finding the logged in users account, order and cart items.
Let's start by first checking if the user is authenticated, and then getting the customer along with finding or creating and order using the get_or_create() method.
get_or_create() documentation link
Once we have the customer and order/cart let's query the cart items with order.orderitem_set.all(). Make sure to add in the items in to the context dictionary so we can use them in our page.
Create Guest Cart
If user is not authenticated/logged in we want to return an empty list called items. This is because our template will try to loop through this list so we need to pass something in.
Step 3 | Render data (cart.html)
00:39:05
In the last step we queried the cart items so now let's render some data out in our template.
Let's create a for loop around our cart row (below header row) and render a row for each item in our cart. For now replace the filler data with the cart item data. We’ll leave the total alone for now.
Replace:
-ImageURL
- Product Name
- Price
- Quantity
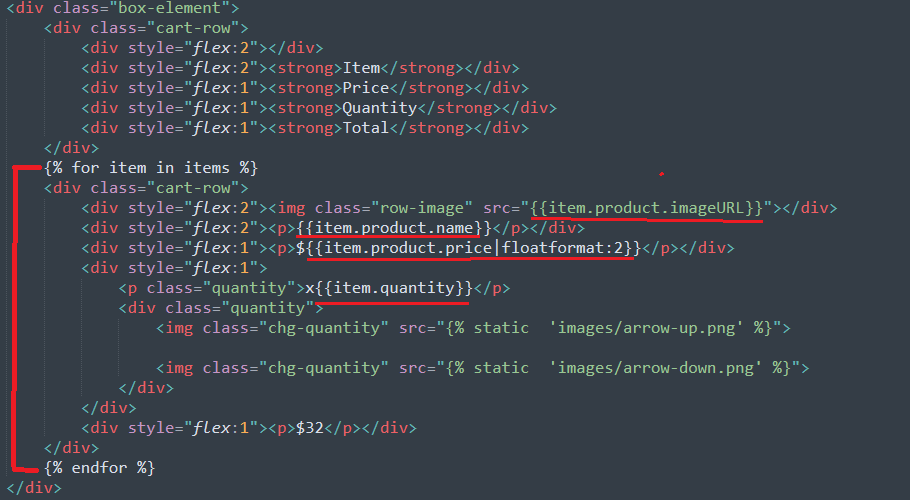
If you added the same exact data as I did your cart should look like this now. Remember if you are not logged in your cart will not show anything.
To ensure you are seeing this data make sure you are logged in.
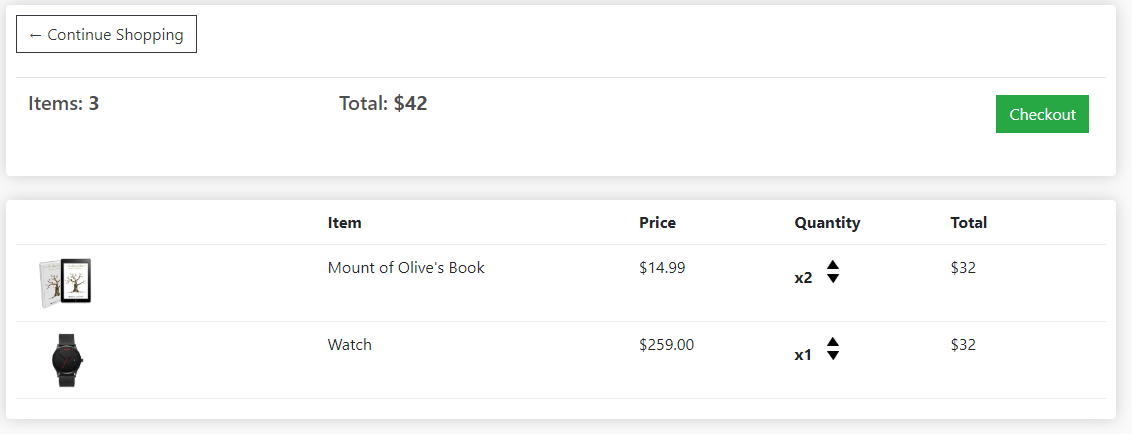
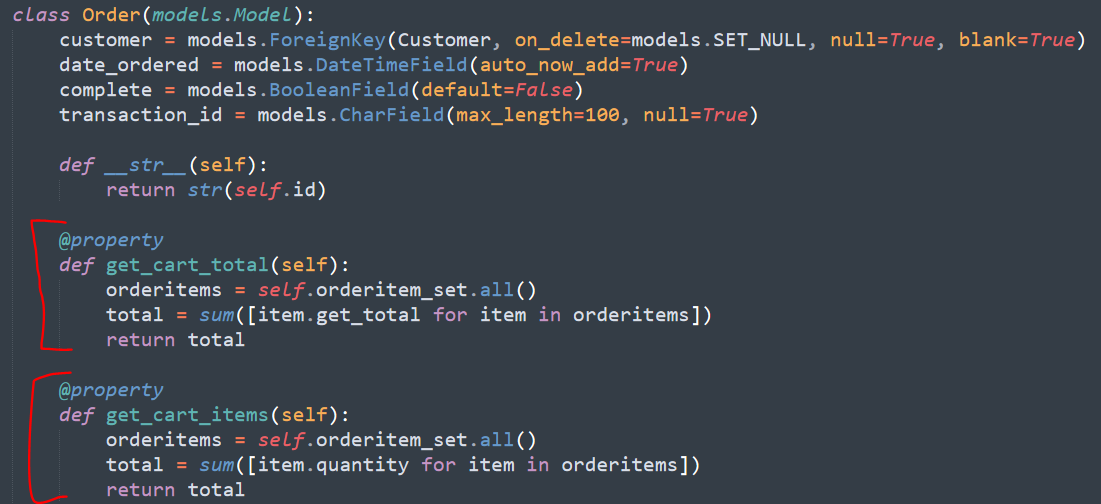
Step 4 | Calculating Totals
00:42:31
If you haven't already noticed we are still lacking some data. Each item total, cart total along with the item totals are also static.
We can fix this by adding some model methods just like we did with the product url.
For the OrderItem model we want to derive the total price from the product price multiplied by the quantity.
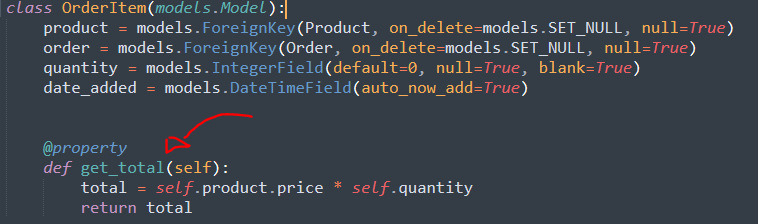
For the order model in models.py we will add a get_cart_total and get_cart_items. Lets use the @property decorator so we can access these like attributes.
Step 5 | Query Totals
00:47:09
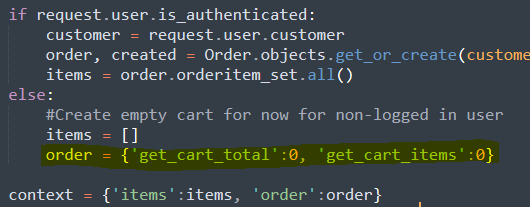
Before we can render the cart and item totals we need to adjust our views to get this data and render it through the context dictionary.
First let's pass in the order we created OR queries into context
Then we need to create an object for Non logged in users. For this object let's add in ‘get_cart_total’ and “get_cart_items” attributes and set them to 0 since the guests cart is empty right now. We are trying to make an excact representation of the user order with a dictionary so our template can always have something to query.
Step 6 | Render Totals
00:47:19
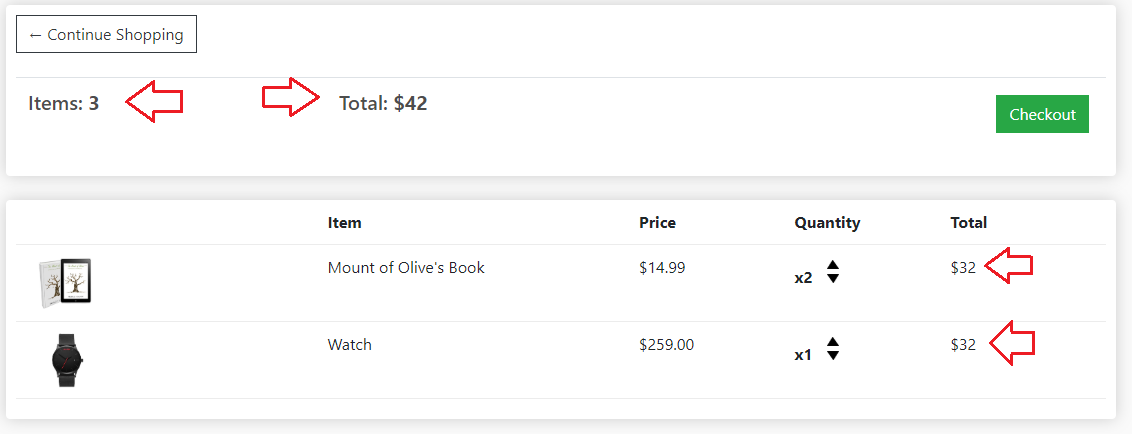
Now in cart.html we can output the totals. In the image below I will highlight the areas we can update with our new data.
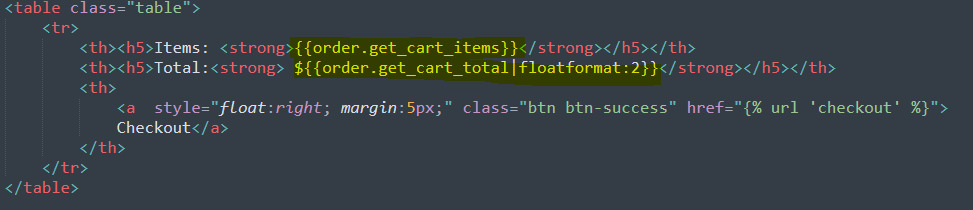

No we should see real totals in our cart :)

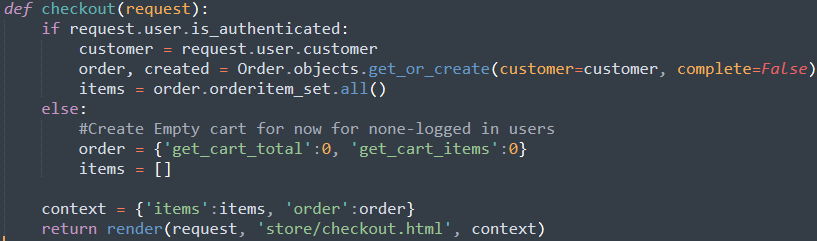
Step 7 | Checkout Page Data
00:50:18
Last thing we want to do in this module is render this same data in our checkout page.
1 - Copy cart view logic into checkout view
We’ll clean things up later but for now let's just copy and paste what we have in our cart view and add it to the checkout view. Make sure to get everything in between the if statement to the context dictionary.
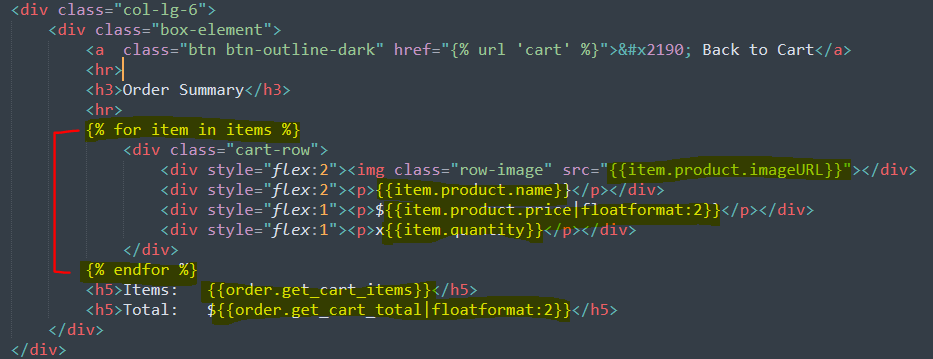
2 - Render cart data in checkout.html
Next let's just create a loop over our order summary rows and add in item data along with our cart totals just like we did in the cart page.
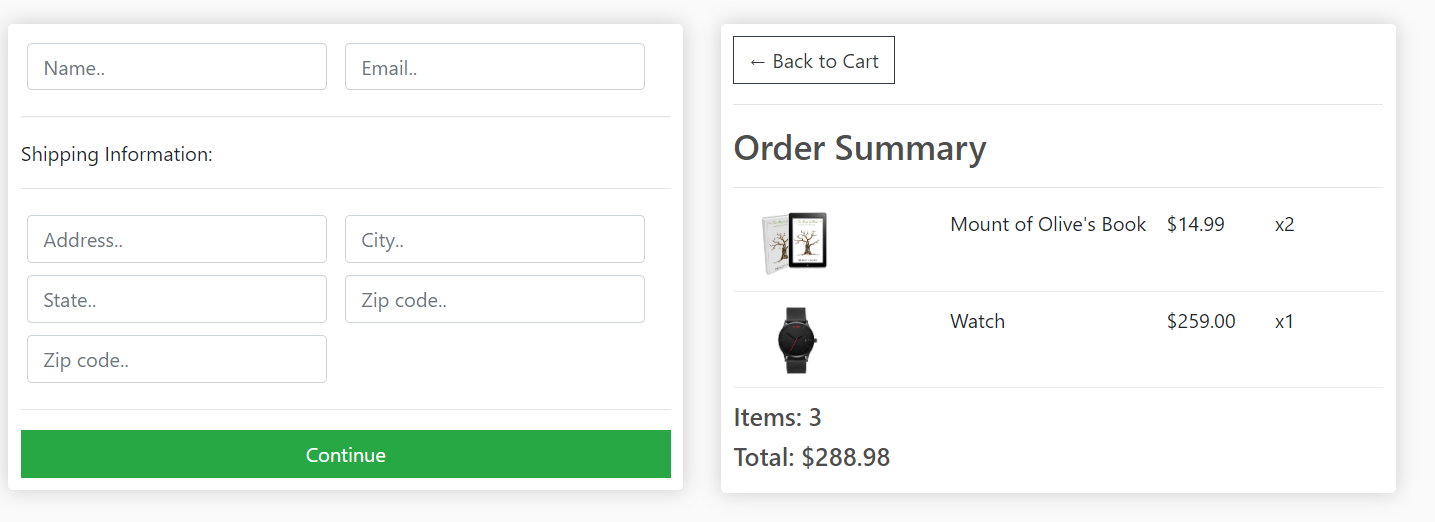
Your page should now look something like this.
I linked up the checkout.html but you can find the code for the checkout view AND checkout tempalte in the code block.
View Source Code